You should have a current version installed already but if not, these instructions will ensure Markbook is installed and will backup correctly on your assigned computer. By not following these instructions, you are at risk in losing your class data and backups.
What do these instructions cover?
- Uninstall previous version of Markbook (if installed previously)
- Make sure Google Drive for Desktop is installed first
- Install Markbook
- Default the location of Markbook’s course files are placed within Google Drive.
- If you are the only one teaching the course use "My Drive"
- If you are co-teaching the course use "Shared Drive"
- Note: IT creates the Share Drive for you. If you do not see a Shared Drive with the course code, contact the helpdesk@greenwoodcollege.org
- Run Markbook’s backup to a local default location on the laptop (not a Google Drive Folder)
Uninstall previous version of Markbook (if installed previously)Go to the Window’s Control Panel
Select Uninstall a Program
Choose Markbook from the list of programs and click Uninstall (follow the prompts to complete the uninstall steps)
Make sure Google Drive for Desktop is installed first
- Follow the above link before completing the steps below
Install Markbook
Download the most recent install file (i.e. MBxx_Install_GCS.exe) from this link (see Help Desk if unable to access)
Run the installer (follow the prompts to complete the uninstall steps)
Default the location of Markbook’s course files are placed within Google Drive
Once Markbook is installed, launch (open) Markbook for the first time
Click I accept
Click Start a new Class, then Next and Next
Enter the Class name
Location of class files:
- for single classes: Under Folder go to G drive (or D Drive) labelled Google Drive → My Drive → Markbook Class Data
- for co teaching classes: Under Folder go to G drive (or D Drive) labelled Google Drive → Shared Drive → the folder labelled as your co teaching class
Organization Tip: You may wish have Markbook Data folder already prepared in your Google Drive
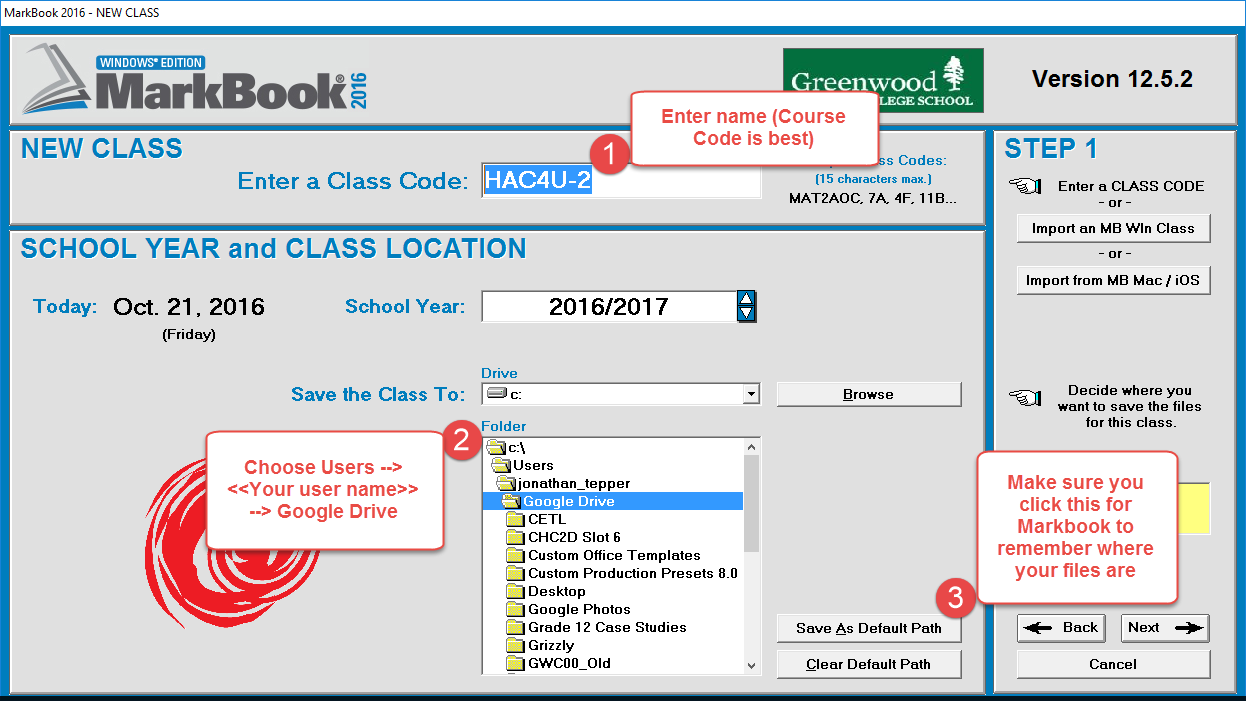
Click Next
Complete the fields: Teacher, School, Phone then click next
Add Student Names completing first name, last name, homeform, student number
Note: if you do not have student numbers, just use a unique number - it is not necessary at this time to use the correct number.
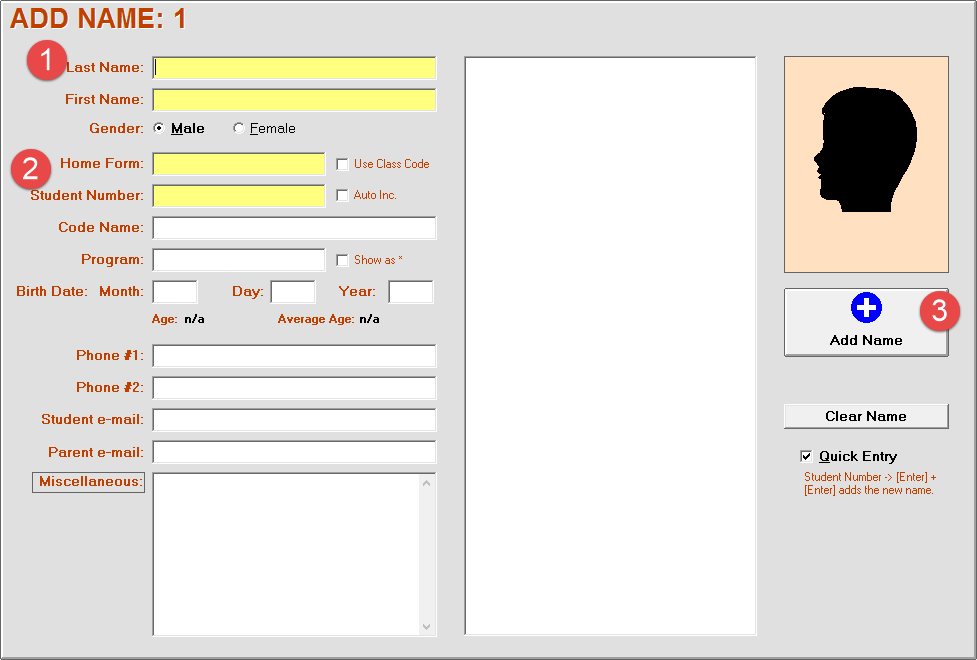
Repeat above step “h” until all student are complete and then click Next
Complete the Mark set step to complete the course setup. Instruction for these final steps can be found here.
Run Markbook’s backup to a local default location on the laptop (not a Google Drive Folder)
Click Backup on the bottom right.

Click Start
A reminder will happen every 10 days, do this when you see the reminder.
Access to the source document with the above details: Markbook - How to install and backup properly